

Handcrafting reliable, custom leather goods & gaming accessories.
Friday, July 31, 2015
Klingon Belt Pouch Action Shot
I just got back an action shot of one of the Klingon Belt Pouches with the client's full Klingon costume. Looking pretty good!

Text Sampler
I've been carving a lot of text lately and especially now that I can print off tap-offs for the letters it seemed about time to codify the fonts I tend to use. There's only been a handful so it's pretty easy to compile them into a sampler of sorts. Now I can offer this to clients as a quick and simple way to pick how they want their letters to look.


Thursday, July 30, 2015
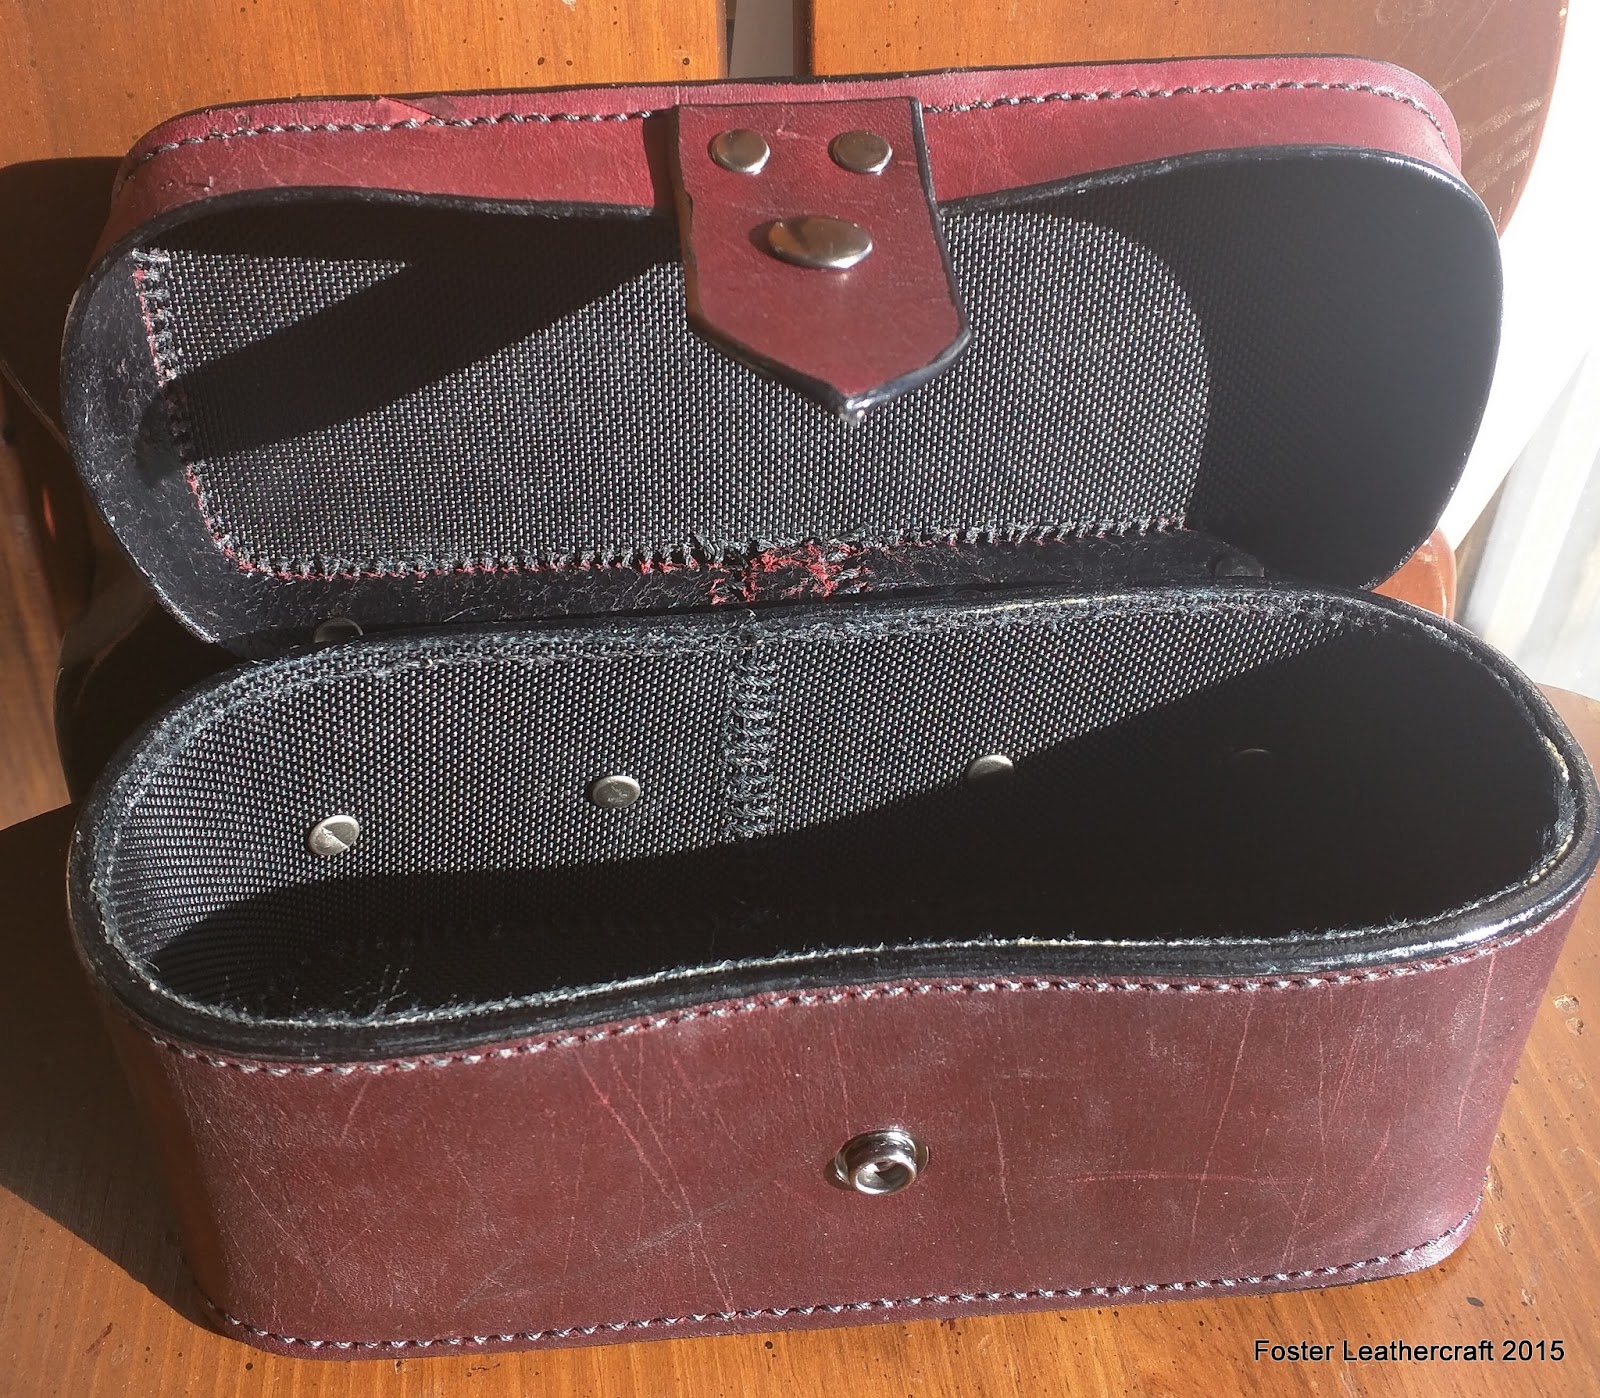
Motorcycle Toolbox
This was a commission for my brother-in-law who wanted a smallish box to fit across the front of his handlebars. I figured it was going to have to stand up to weather and whatever beating might come going down a highway so the thing's built like a brick. It's all latigo, waxed thread, and lots of kote. The lining is cordura ballastic fabric, one of the precursors to kevlar, so I'm fairly confident the innards are equally durable. Hell of a project but I'm pretty content with the result.


Monday, July 27, 2015
3D printing solved... mostly
After more than a little troubleshooting, research, and experimentation, I've finally gotten the printer to start turning out consistent prints. It took a three part solution to really resolve and while not every print is coming out perfectly, most of them are coming out reasonably well.
- No more ABS - There's a few exceptions to this, but for the most part I'm finding ABS too much of a pain in the arse to use. It damages the print bed just about everytime I use it (because the printer cranks the extruder up to 275C) and between the peeling and shifting it's far too unreliable.
- Using Cura as a slicer - M3D advertises (still) that their printer can be used with any open source software. However the reality is that prints need to be sent to the printer through their propriety software. That software causes a heap of problems. Aside from being clunky and cumbersome to use, it has an annoying tendency to produce errors in the prints. Fortunately some creative fellows somewhere have figured out a small hack that all allows the models to be sliced in Cura (an Open Source application) and then piped directly into the printer's spool. It's a little click-intensive and requires some monitoring (twice I've had the printer try to inject molten filament -into- the print ped) but it works.
- Eliminating all tension on the filament - On any (or at least most) 3D printers there's a gear which feeds filament into the extruder. On the M3D that gear is part of the print head, directly above the extruder. This probably has some advantages but it also means that even the smallest bit of tension on the filament can cause an entire print to fail. Even hanging the spool off the side of the printer causes too much tension as the filament is pulled over the top of the chassis. My solution was to jury-rig a quick and dirty spool holder above the printer. I can probably pretty it up a bit but so far this has been the biggest help.


Thursday, July 23, 2015
Pouch for the Yukon


Monday, July 20, 2015
Shoulderstraps Galore
I haven't just been spending the last week or two working on the M3D printer. There's been quite a few orders too and most of them have been shoulderstraps. Shoulderstraps have become fairly routine at this point. So much so that I've stopped regularly writing blurbs for them just to keep the blog from getting too repetitive. This last batch had some unique ones though. Including one that had to be color-matched to a specific sample and another that's bound to go on a vintage spanish messenger bag. I've also started working on some shoulderpads to go with the straps. There should be more on those later.


3D Printing Update
I've had this M3D printer for almost a couple weeks now and for most of that time I've had it busy trying to print one thing or another. I can honestly say that I've learned an awful lot over that time. I've made a few models of my own, experimented with different materials, researched printing techniques and configures, etc etc etc. Unfortunately, while I think I've learned a lot I can't say the same for the printer. If anything my prints seem to have gotten worse over the past week, though that may be because of the material I've been using. Printer filament primarily comes in two varieties: PLA and ABS. The first is more malleable, easier to use, and recyclable. The second is cheaper, messy, and hypothetically stronger. Since my goal is to make tools that would need to stand up to some malletting action I've been focusing on ABS.
ABS is challenging for a variety of reasons but the last nut for me to crack is getting the layers to properly adhere to one another. That's probably a matter of dialing in the nozzle temperature with this particular brand. The filament manufacturer's recommended anything from 210-250F while the M3D's recommended 275F. I've tried everything from 230-250 and it seems to scale between layers peeling apart (too cold) to the extruder mashing everything together in a flat smush (too hot).
The biggest problem I've been having is shifting. At first I'd thought it was due to backlash (essentially a gearing problem) but all my tests to wheedle that down have come up negative. That doesn't change the fact that any print of any size is so badly skewed as to be unusable.


The line of failed prints is much, much longer than the successful ones. I've used up about half the PLA filament (silver & black) that I ordered with the printer and I'm about ready to toss in the towel on ABS entirely. I'm at the point where the only other thing I can think to do is doing a teardown of the printer. Hopefully there's some loose screw or widget that I can tighten up and get it working reasonably reliably.
Unfortunately it's about the last thing I want to do at just this moment. I have plenty of orders to get through in the meantime anyway. I reckon I'll take this week off from 3D printing and come back at it next week, ready to dive right back into it.


ABS is challenging for a variety of reasons but the last nut for me to crack is getting the layers to properly adhere to one another. That's probably a matter of dialing in the nozzle temperature with this particular brand. The filament manufacturer's recommended anything from 210-250F while the M3D's recommended 275F. I've tried everything from 230-250 and it seems to scale between layers peeling apart (too cold) to the extruder mashing everything together in a flat smush (too hot).
The biggest problem I've been having is shifting. At first I'd thought it was due to backlash (essentially a gearing problem) but all my tests to wheedle that down have come up negative. That doesn't change the fact that any print of any size is so badly skewed as to be unusable.

I've had 3-4 prints that came out more or less correctly. With one exception they were all less than a quarter of inch tall. That one, singular exception is the spool arm that's meant to hold the filament spools to the side of the printer. That it came out correctly gives me some hope that the printer can work correctly. The capacity is there.

The line of failed prints is much, much longer than the successful ones. I've used up about half the PLA filament (silver & black) that I ordered with the printer and I'm about ready to toss in the towel on ABS entirely. I'm at the point where the only other thing I can think to do is doing a teardown of the printer. Hopefully there's some loose screw or widget that I can tighten up and get it working reasonably reliably.
Unfortunately it's about the last thing I want to do at just this moment. I have plenty of orders to get through in the meantime anyway. I reckon I'll take this week off from 3D printing and come back at it next week, ready to dive right back into it.


Tuesday, July 14, 2015
After 4 days of printing...
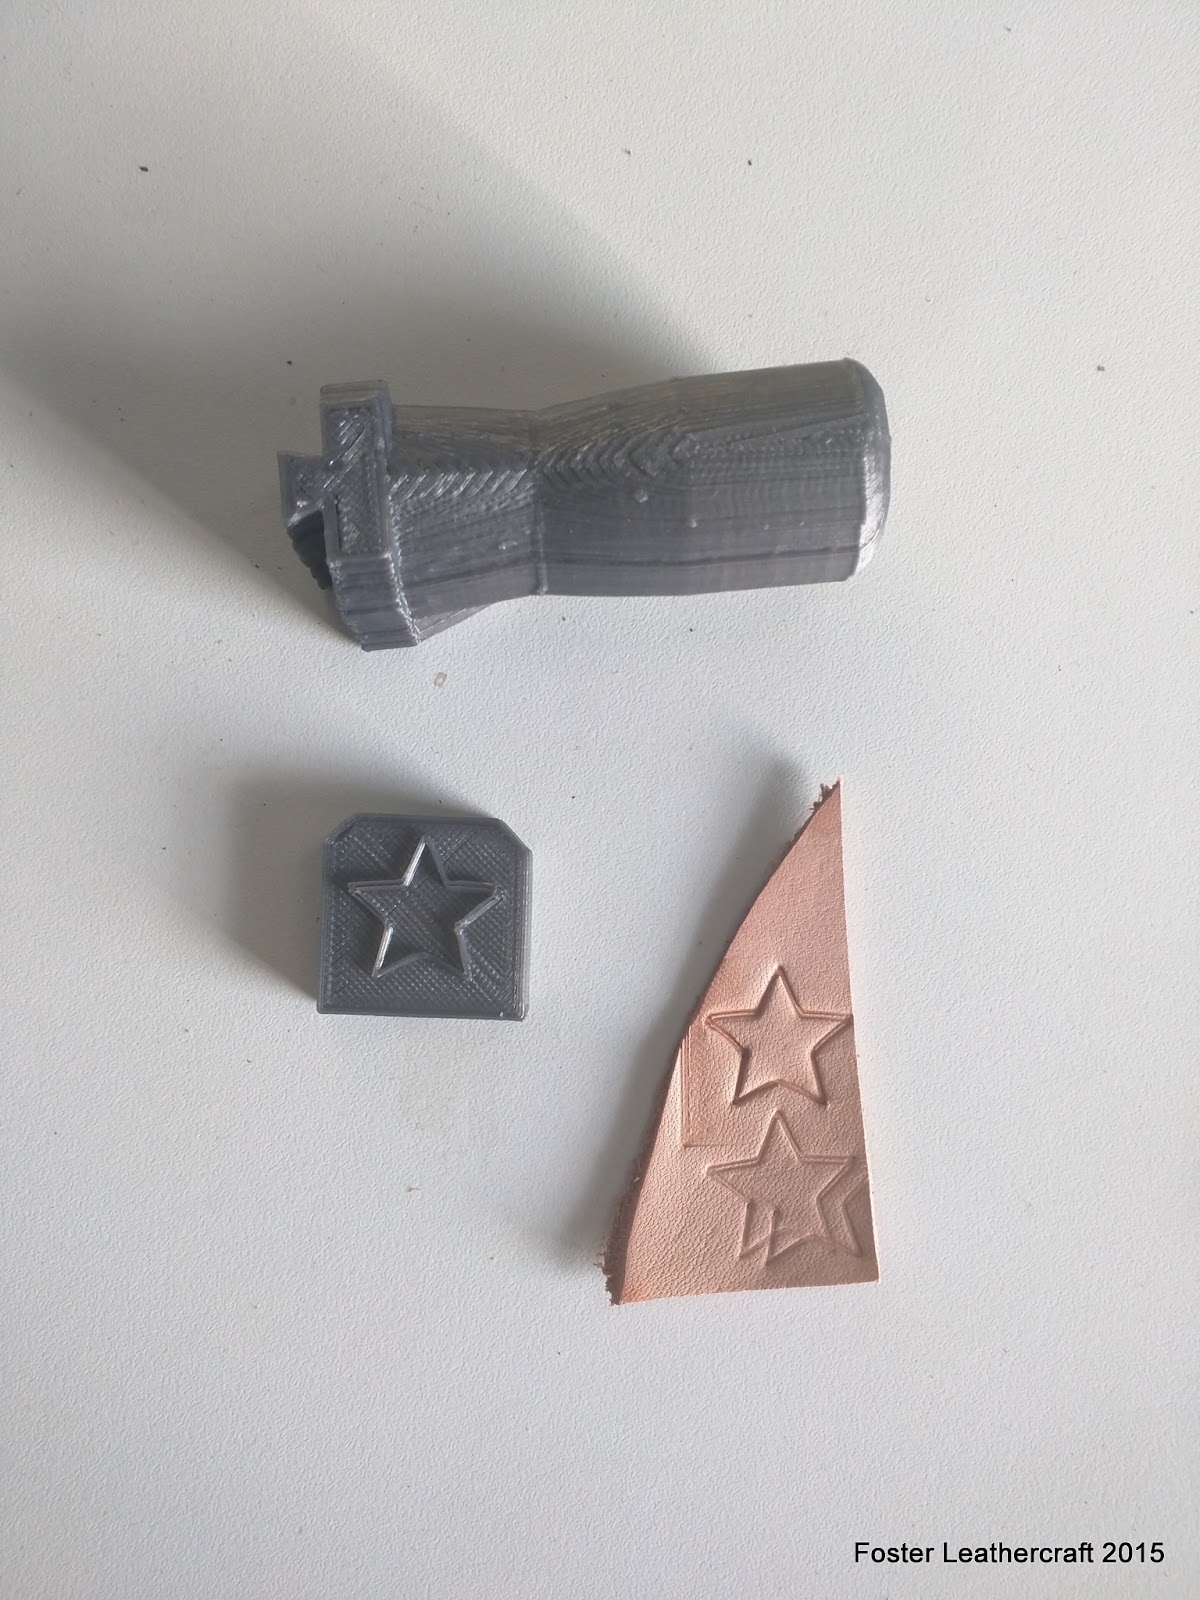
I've been continuing to experiment with this M3D printer and I'm starting to have some success. A lot of it comes down to calibrating the printer before each print, or at least everytime the filament is changed out. There are still some other prints I'm having difficulty with, oddly persistent difficulty, but on the whole things are mostly working out.
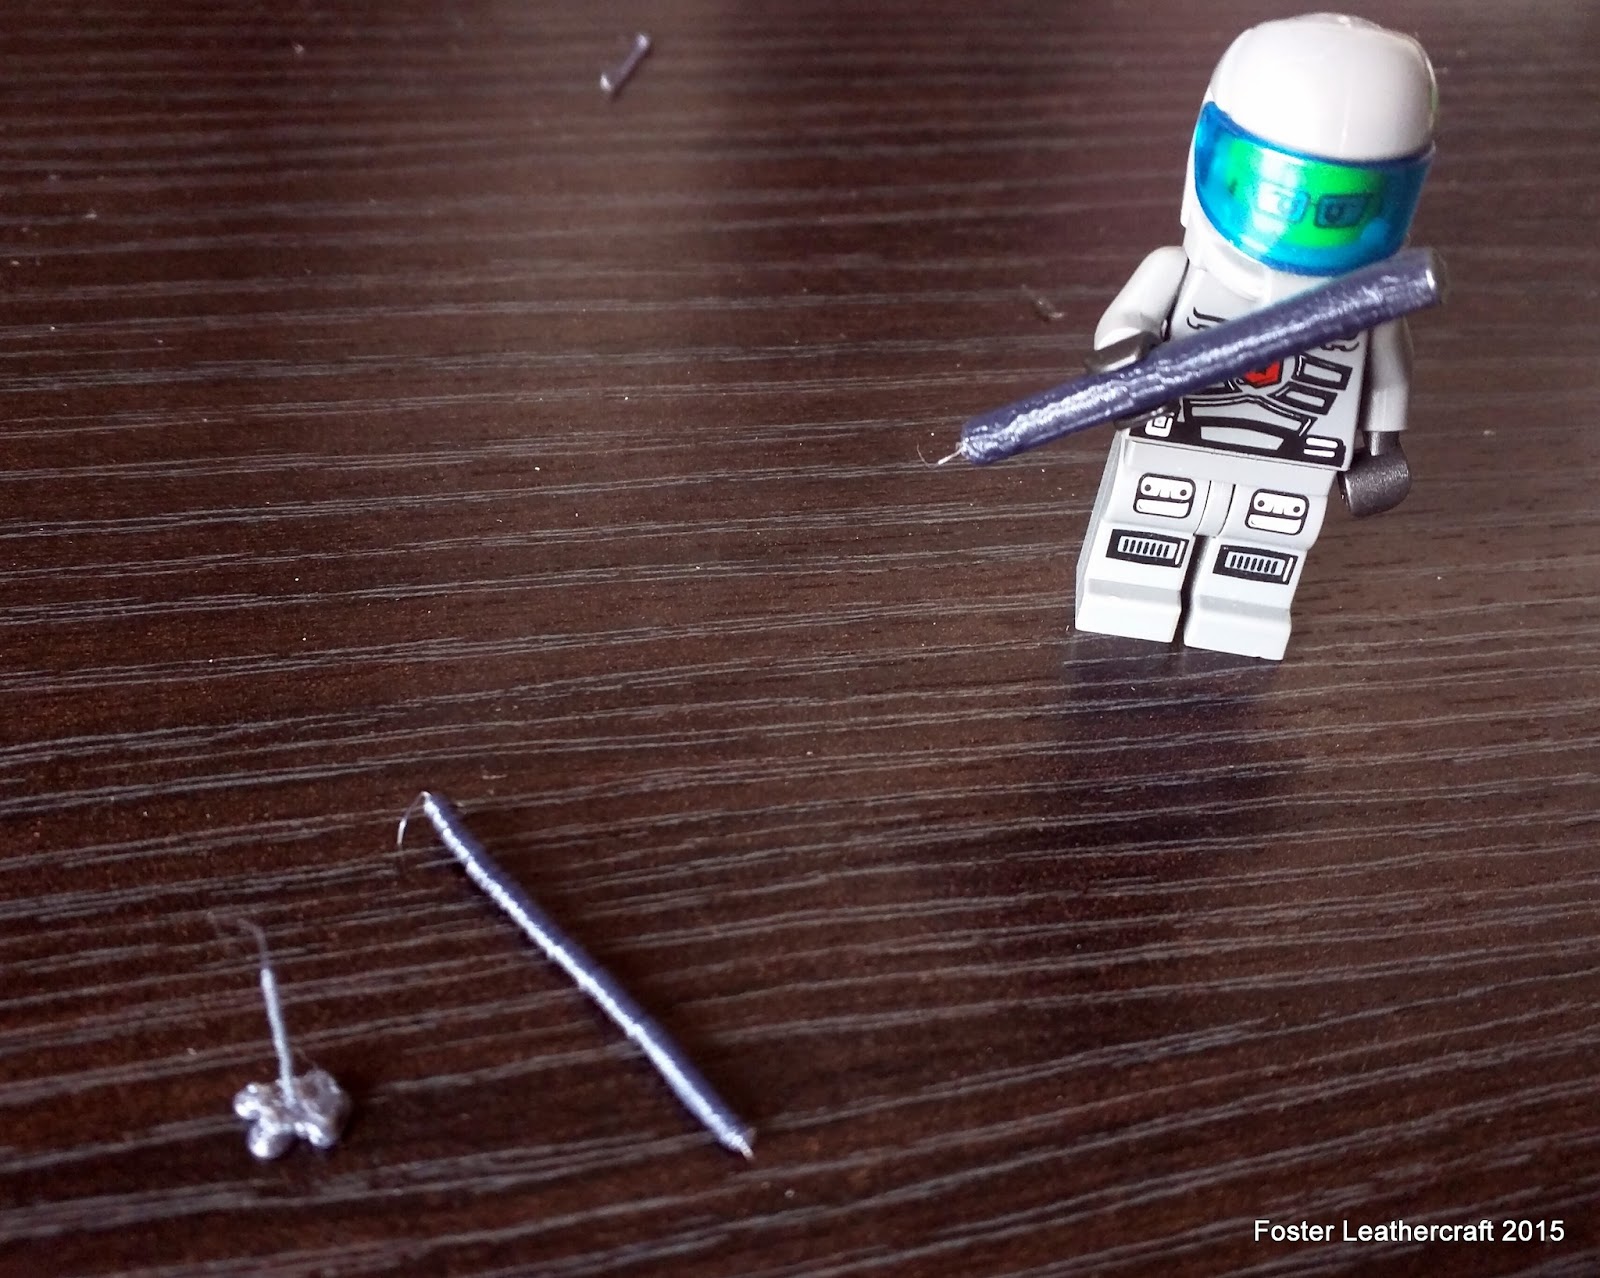
I made my first original .stl (or at least the first one I wasn't sending off somewhere else to be printed) and printed it this morning. It took a few tries to get the scaling right. I had to do that mostly by eye and experimentation since M3D's software does its scaling by proportion rather than measurements. But eventually I managed to print out a little quarterstaff bit for the LEGO Minifig I've been using as a GURPs mini. Simplistic, yes (it's essentially a 3x50mm cylinder), but I feel it's been a good stepping stone for future models.

I made my first original .stl (or at least the first one I wasn't sending off somewhere else to be printed) and printed it this morning. It took a few tries to get the scaling right. I had to do that mostly by eye and experimentation since M3D's software does its scaling by proportion rather than measurements. But eventually I managed to print out a little quarterstaff bit for the LEGO Minifig I've been using as a GURPs mini. Simplistic, yes (it's essentially a 3x50mm cylinder), but I feel it's been a good stepping stone for future models.
Friday, July 10, 2015
Now with 3D printing!
I opened the shop a little over a year ago and right about then I'd ordered one of these M3D printers. They'd started shipping them back in November of last year and I've been waiting for the past 9 months for mine to arrive. It finally did yesterday. =)

I'd been looking into 3D printing pretty heavily when I ordered the printer but it's been 13 months since then. I've been trying to catch up so far this morning. I'll get around to the reading and research this evening but so far I've been getting a little experience by experimenting with different models and print settings. I've been having some... mixed success with that so far...

I have a long list of tools I intend to start printing once I work out the kinks. I'm hoping I can get to a point where I can print hardware or decorations for products as well. That'll be awhile from now though, after I've put the materials through the ringer to make sure they'll hold up.
Range Card Holster
In this case the client was a motorcycle instructor who wanted to replace the flimsy plastic/cloth pouch that came with the Range Card pad they use to grade students. What we came up with was basically a holster for the pad. The pattern isn't terribly complicated and by doubling over the leather it has the perfect amount of rigidity. I've gone ahead and added it to the shop just in case anyone else has a use for a paper pad holster with a belt clip.


Thursday, July 9, 2015
Twin Turndog Shoulderstraps
These were for a fellow in the UK who wanted a pair of shoulderstraps that matched his brand. In this case that meant they'd be carved with his logo and stained a particular shade of purple. The staining was a challenge (leather doesn't seem much like being purple) but after spending a morning getting it right I'm pretty happy with it. I'm pretty sure the client will be too.


Subscribe to:
Comments (Atom)