I was smack in the development process for a few new production lines but that's been interrupted by active orders for the time being. I was able to get the new 5e Condition Cards though so those are now available here: https://www.etsy.com/ca/listing/708670043/dnd-5e-condition-cards
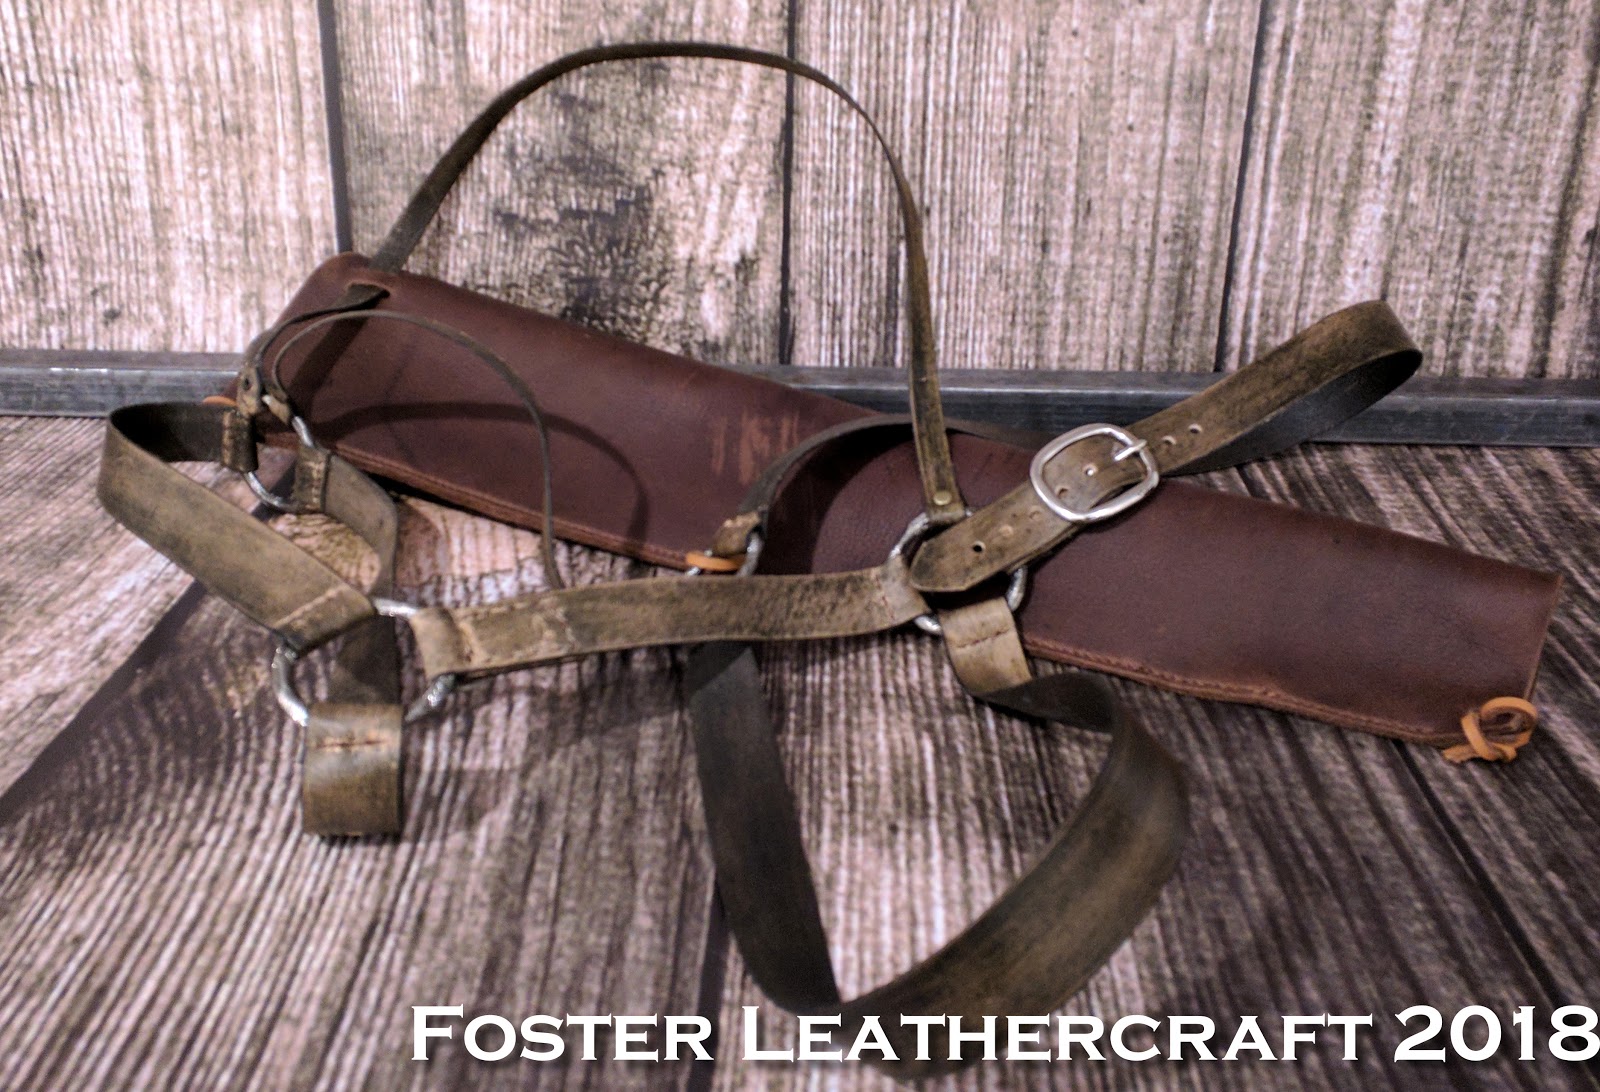
I've also added a variation to the Evil Dead 2 Harness so clients can select whether it comes with a hook or not at purchase.
In the meantime I've still got some prototypes limping along between orders and there's some pretty interesting projects I'll be digging into soon. Might be more to report before too long. =)
Showing posts with label Cosplay. Show all posts
Thursday, May 23, 2019
Announcement: Condition Cards
Wednesday, February 20, 2019
Apothecary Satchel
The client was looking for a way to carry 20-30 bottles conveniently and securely. We went through a few different concepts before settling on a roll that hangs from a shoulder strap. Inside the roll are 24 "holsters" sized to just fit the bottles in question with keepers to keep them from falling out.
I didn't have access to any of the bottles so I made a lot of use of a few jigs that should match the bottle's dimensions. Those turned out to be critical though they'd've been heck to produce without the laser. We used a half stitch to stay within the client's budget. That probably cut the production time in half without compromising much of the durability. I'm not sure if I like the look of a half stitch as much as a good saddle stitch but it's certainly viable option.
Tuesday, October 2, 2018
Evil Dead Holster 2.0
I'm not sure what it was about this fall but I had a whole bunch of orders for the Evil Dead Holster. Since it isn't something on the shop it was a little odd to keep getting requests for them. One of those was from an actor who'd been playing Ash in a stage version of the movie and wanted to recreate his costume (because who wouldn't?).
Because each order was ad hoc there was always a lot of back and forth trying to work out sizing information and details like that. I figured I could provide a better experience and save a fair bit of time if I just developed a production version that was adjustable. So I picked up some sliders with a supply shipment and got to work. I'm waiting on some feedback from the client and hoping to add this as a new listing later this year.
Monday, March 19, 2018
Cosplay, Evil Dead Holster
I can't remember if this is the second or third of these I've sold but if it comes up again I might just cut to the chase and make it a regular listing. The client this time wanted to be able to carry an actual shotgun (as opposed to a plastic prop) so I made a few material substitutions to the original pattern. The fitting is still enough to turn my brain inside out and rub it wrong-ways down a washboard but it's a sturdy construction and the belt gives it some adjustment.
Thursday, November 30, 2017
Cosplay, Assassin Creed Vambrace
The client has an Assassin Creed character from the WWII era they'd come up with and were assembling the essential parts of the outfit. They'd already arranged the trademark blade but needed a bracer to attach it to. I was able to measure a few pictures of the blade they'd ordered to space the holes so they should line up pretty well. Included a few rivets too so everything'll match nicely.
Meanwhile, Dec starts tomorrow and I'm set to continue my little tradition of tossing in little ornaments with orders shipped that month. This year I've printed a bunch of 2" silver snowflakes. I'm enjoying the design but at this rate I'm going to need to print a lot more...
Thursday, August 31, 2017
Cosplay, Fallout 4 Harness
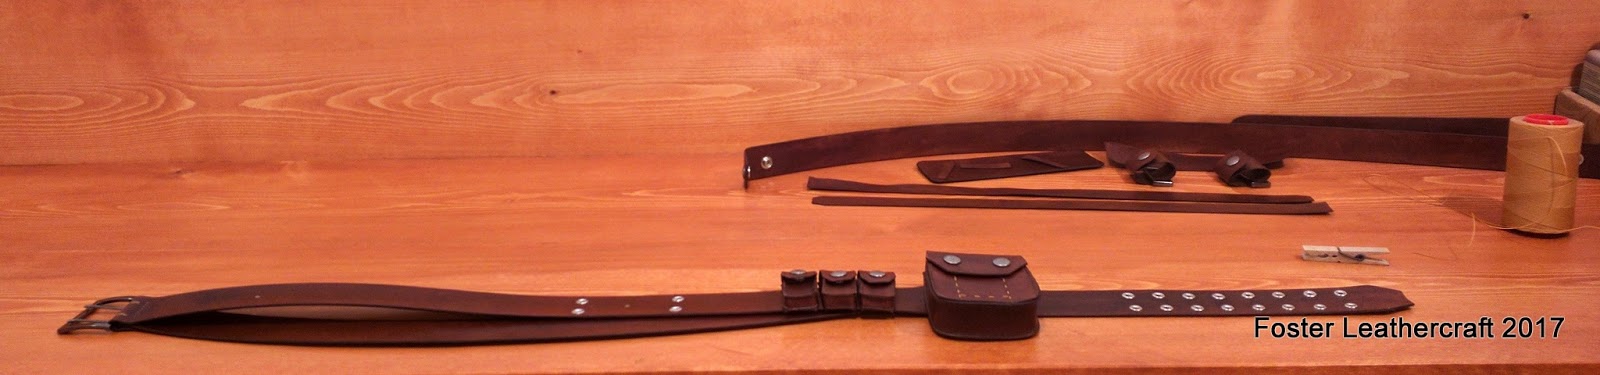
I'm usually pretty good at predicting complications during the drafting phase, even with complex builds like cosplay. This order had a couple of hooks I didn't see coming though. The order was for a functional, leather harness like the Leather Armor in the Fallout 4 games. The client had already purchased a the harness from another leatherworker but had never received anything more than pictures.
As is often the case with cosplay the drafting phase was pretty intensive. I had a few measurements and lots of screenshots to work off. From previous experience I knew that buckles larger than 2" are just about impossible to find so I made the assumption that the belt was 2" wide and scaled everything accordingly. That was the first "whoops". It would have been more cumbersome but I should have used the avatar as my meter when figuring out the scale. This became evident once I started production and found that the pouches were a bit smaller than they should have been. In fairness, it wasn't that big of a difference. The pouches are still about 80% of the size they should probably have been and the relative sizes are spot on to the photo references. Aside from the tiny trio (mostly decorative to begin with) in the back they were all large enough to be practical, usable pouches.
About half-way through the production, after I built the belt was was preparing to work on the bandoleer & chest pouches, the client let me know what they'd intended to carry in the harness. More importantly I found out the measurements for those items. Even if all pouches had been to full scale they might not have been large enough for the wallet and phone they wanted to carry. It was too late to modify the belt so I had to decide between making hasty alteration to the chest pouches or starting over from scratch. If this had been the only order I was working on at the time I probably would have started over but that would've meant delaying the other orders I had, one of which had a hard deadline. So in the 9th hour I cut new leather for the chest pouches and made them waaaaaaaay larger than the scale. They wound up so big that all three of them wouldn't fit together on the front of the bandoleer and one had to be moved to the belt.
I'm conflicted but, I think, ultimately satisfied with the work I did here. If I'd just had the specs at the start though I could've made a harness that perfectly matched the game art. At the very least something closer than what we got.It was a rough situation that I tried to make the best of and, most importantly, the client is happy with the result. The harness fits their stuff and it's solidly made, perfect for traipsing conventions and ren faires with.
As is often the case with cosplay the drafting phase was pretty intensive. I had a few measurements and lots of screenshots to work off. From previous experience I knew that buckles larger than 2" are just about impossible to find so I made the assumption that the belt was 2" wide and scaled everything accordingly. That was the first "whoops". It would have been more cumbersome but I should have used the avatar as my meter when figuring out the scale. This became evident once I started production and found that the pouches were a bit smaller than they should have been. In fairness, it wasn't that big of a difference. The pouches are still about 80% of the size they should probably have been and the relative sizes are spot on to the photo references. Aside from the tiny trio (mostly decorative to begin with) in the back they were all large enough to be practical, usable pouches.
About half-way through the production, after I built the belt was was preparing to work on the bandoleer & chest pouches, the client let me know what they'd intended to carry in the harness. More importantly I found out the measurements for those items. Even if all pouches had been to full scale they might not have been large enough for the wallet and phone they wanted to carry. It was too late to modify the belt so I had to decide between making hasty alteration to the chest pouches or starting over from scratch. If this had been the only order I was working on at the time I probably would have started over but that would've meant delaying the other orders I had, one of which had a hard deadline. So in the 9th hour I cut new leather for the chest pouches and made them waaaaaaaay larger than the scale. They wound up so big that all three of them wouldn't fit together on the front of the bandoleer and one had to be moved to the belt.
I'm conflicted but, I think, ultimately satisfied with the work I did here. If I'd just had the specs at the start though I could've made a harness that perfectly matched the game art. At the very least something closer than what we got.It was a rough situation that I tried to make the best of and, most importantly, the client is happy with the result. The harness fits their stuff and it's solidly made, perfect for traipsing conventions and ren faires with.
Friday, February 17, 2017
Evil Dead Holster & Harness
I enjoy the challenge of recreating props from classic movies. There's often just enough information in screenshots and promotional bits to get an idea of how a thing fits together. In this case I had a commission to recreate Ash's shotgun holster from the second Evil Dead movie. I probably spent more time researching this particular prop than anything else I've done in awhile.
In the movie, Ash seems to be make his holster on the fly out of belts and an old flap of fabric. It has a cobbled together sort of look without a whole lot of "polish". The holster is really just an open sleeve that looks to be tied onto the harness in some way. And then there's a metal hook under the right shoulder that blends in with his shirt in nearly every picture.
The tricky part here was in sizing all the straps and rings that make up the harness. Few of the movie screenshots were clear enough to take measurements from and the really useful measurements would've been impossible to make while the thing was being worn. It took a fair amount of reverse engineering and measurements from the client to come up with a draft. I wasn't terribly sure about how it would all sit so I made a mock-up out of suede lace and spare hardware to test the ratios. Then I just had to adjust the straps to the client's measurements.
If I'd had any sheet metal (and the tools to work/cut it) the hook wouldn't have been too difficult to fabricate but as it was I wound up 3D printing it. I'm pretty happy with the final result. It should be smack in the butter zone between being solid and looking cobbled together. The holster is tied to the harness in a way that the client will be able to adjust it to their fit. I guess you could say it's... Groooovy.
In the movie, Ash seems to be make his holster on the fly out of belts and an old flap of fabric. It has a cobbled together sort of look without a whole lot of "polish". The holster is really just an open sleeve that looks to be tied onto the harness in some way. And then there's a metal hook under the right shoulder that blends in with his shirt in nearly every picture.
The tricky part here was in sizing all the straps and rings that make up the harness. Few of the movie screenshots were clear enough to take measurements from and the really useful measurements would've been impossible to make while the thing was being worn. It took a fair amount of reverse engineering and measurements from the client to come up with a draft. I wasn't terribly sure about how it would all sit so I made a mock-up out of suede lace and spare hardware to test the ratios. Then I just had to adjust the straps to the client's measurements.
If I'd had any sheet metal (and the tools to work/cut it) the hook wouldn't have been too difficult to fabricate but as it was I wound up 3D printing it. I'm pretty happy with the final result. It should be smack in the butter zone between being solid and looking cobbled together. The holster is tied to the harness in a way that the client will be able to adjust it to their fit. I guess you could say it's... Groooovy.
Monday, August 22, 2016
Bull Hood
This was a commission for a full mask resembling a bull. I've made a few small masks (and a pair of goggles) but nothing that wraps around the entire head before so it made for some pretty interesting challenges.
An early task was trying to figure out how to manage the horns. The obvious option was to special order some steer horns and install those somehow. Natural steerhorns are 8-12" long through and would've been pretty unwieldy. After shopping around for awhile I wound up printing the horns myself on my 3D printer. After friction welding them to an elbow and a lot of sanding by hand I gave them an ink wash to mimic natural horn color. The result turned out better than I expected at first. If I didn't know the horns were plastic I'd probably think they were natural without picking them up and handling them.

The mask itself presented its own challenges but I'm more familiar with how to fold and interface leather to create a structure. I made a series of paper prototypes to narrow in on the geometry and played the rest by ear during construction.
I wound up having to add an assembly to hold the horns mostly in order to move them back over the head (instead of on top of the forehead) and anchor the dorsal straps so they didn't slide down the head. A big benefit of this was I was able to make the horns removable. They're just secured with some snaps so they can pop on and off for easier shipping and storage.
One last element was the client requested chains running along the bottom of the mask. We tossed around a few ways of making that happen (metal chains, 3D printed chains, braided bridle, etc) and settled on carved appliques. At the client's request those are also held on with snaps so they can pop on and off.
An early task was trying to figure out how to manage the horns. The obvious option was to special order some steer horns and install those somehow. Natural steerhorns are 8-12" long through and would've been pretty unwieldy. After shopping around for awhile I wound up printing the horns myself on my 3D printer. After friction welding them to an elbow and a lot of sanding by hand I gave them an ink wash to mimic natural horn color. The result turned out better than I expected at first. If I didn't know the horns were plastic I'd probably think they were natural without picking them up and handling them.

The mask itself presented its own challenges but I'm more familiar with how to fold and interface leather to create a structure. I made a series of paper prototypes to narrow in on the geometry and played the rest by ear during construction.
I wound up having to add an assembly to hold the horns mostly in order to move them back over the head (instead of on top of the forehead) and anchor the dorsal straps so they didn't slide down the head. A big benefit of this was I was able to make the horns removable. They're just secured with some snaps so they can pop on and off for easier shipping and storage.
One last element was the client requested chains running along the bottom of the mask. We tossed around a few ways of making that happen (metal chains, 3D printed chains, braided bridle, etc) and settled on carved appliques. At the client's request those are also held on with snaps so they can pop on and off.
Subscribe to:
Posts (Atom)