Since PAXSouth is held in my home town (or the city closest to it anyway) it'd be hard for me to resist it. I had a lot of fun there last year and this year my wife's coming along so there'll be all the more fun. By the time this goes up I'll probably be on my way to "ol' San Antone". Obviously I won't be getting much time in at the workbench this week but I'll be keeping my eye out for good cosplay. There's some D&D-related panels this year that we're rather interested in seeing so I'm hoping to learn some things along those lines too.
In the meantime, there's a bit of enormous mega-news that I've been sitting on for a week or two. It's big enough that I'm inclined to save it until after PAX, if only to better focus on the convention-y goodness. See ya'll in Feburary!

Handcrafting reliable, custom leather goods & gaming accessories.
Tuesday, January 26, 2016
Monday, January 25, 2016
Busted Luxury Purse Strap Duplicated
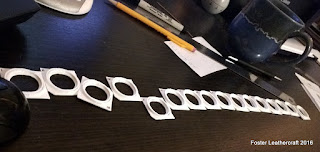
This wound up being a rush order to get in the mail before we left for PAX (tomorrow morning) so I can label it "Mission Accomplished" on all objectives! The client owned a luxury purse strap from one of those big brands. I'm not so sure if I should name which one but they've just started throwing their ads over YouTube so there's there. In any case, the point where the strap anchored to the purse snapped a few weeks ago. This particular line of straps had been discontinued and the client was trying to find a replacement.
Fortunately for me this style is numbskull simple. They'd used some really unconventional dimensions which made finding a replacement buckle pretty challenging. Once the client was able to send me the original, busted strap that became a non-issue. I was able to match the dimensions exactly and got pretty darn close on the color. The buckle and keepers are still the originals. The biggest difference is that I beveled the edges and did a thorough job of staining and conditioning. It looks to me like the luxury brand assembles the straps and then gives them a light treatment with some neatsfoot oil or something similar. I'm pretty unimpressed for what they apparently charge.


Fortunately for me this style is numbskull simple. They'd used some really unconventional dimensions which made finding a replacement buckle pretty challenging. Once the client was able to send me the original, busted strap that became a non-issue. I was able to match the dimensions exactly and got pretty darn close on the color. The buckle and keepers are still the originals. The biggest difference is that I beveled the edges and did a thorough job of staining and conditioning. It looks to me like the luxury brand assembles the straps and then gives them a light treatment with some neatsfoot oil or something similar. I'm pretty unimpressed for what they apparently charge.


Sunday, January 24, 2016
The Glorious Dragon Map
The story behind this map goes that the client has been running tabletop games for quite some time. When one of his players was moving away the player doodled this map up as a parting gift (in an afternoon!). The client has been using the map for his setting for the past 12 years and it's easy for me to see why. The art and detail that went into this map is a bit mind boggling.
 Because of that it took me two and a half days to trace the map on the computer in order to form a draft. This would be the first of at least two more times where I would go over the map line by line. Fortunately the rest of the process didn't take quite as long.
Because the draft took so long to make I decided against using the conventional form of transfer. Typically, once the leather is cased a print-out is placed on the leather and traced with a stylus to transfer the design onto the leather. However, if I did that this time then I knew there was a reasonable chance the leather would decase before I was ready to carve it. So I decided to use an ink transfer to apply the entire design to the leather all at once. Instead of spending 15 hours (more likely twice that) transferring the design, it'd be done in 15 minutes.

I've used ink transfers on leather before, but never for this particular application. So since this project was so big I did some experimenting and one full proof of concept to make sure everything worked together. I wound up determining that I would get the best transfer by applying the ink transfer immediately after casing the leather.
 This was one of those ideas that seemed simple at first but of course it wound up a little more complicated after a thought or two. For one thing, the map is 11x17" and the printer gets really funny about scaling at those dimensions. The only way to print a map (at least on my printer) of that size without loss is to print it as four 4.25 x 11" quadrants. It still scales a bit oddly that way, but it's an odd I can compensate for. At that point the biggest challenge becomes lining up the quadrants and keeping them stationary during the transfer. The slightest budge during the transfer can smudge the whole quadrant. And it doesn't help that they tend to be faintest near the edges. So while the transfer is finished in a relative blink of an eye it's a very, very tense and stressful blink.


From that point on it was mostly established territory. I cut the design into the leather and went back over it it to carve and stamp as appropriate. This was the first project I've done with really high quality veg tan from Italy (thanks to new suppliers) and it carves beautifully. The transfer wasn't perfect so there were some spots where I was going off memory and my printed draft to guide the swivel knife but that turned out to work pretty well. The original artist had used different lines to distinguish types of terrain and I followed suit using different carving techniques to accentuate those differences. In particular I used a pear to carve the water, rather than burnishing it as I would normally do. This helps to raise the land even more and creates an effect I rather appreciate.
 When it came to staining we'd already decided we wanted to tint some areas. Cliffs and ravines I was going to go over with light brown and the border was getting a dark brown. I used a fairly diluted blue for the water (hence some of the patchyness). There was a lot of back and forth over whether the forests should be tinted but I couldn't find a stain that would work well and still be distinguishable from the water. We decided to forgoe tinting the forests and I think it's much better for it.
 For the actual staining I used my usual mix of Saddle Tan antiquing gel. There was some layering and touching up involved to guarantee that I got every itty bitty bit of the map stained. Over that went an additional straight coat of finish. The assembly was a relatively simple matter of gluing the hardboard backing into place and fixing a bit of latigo lace to it; same as all the other maps.
The result is satisfyingly impressive. Almost all of the original map's detail has carried over. Even some of the subtler effects, like the hill-ribs, can be seen on the leather. The tinting and antiquing gel work together to create an excellent impression of an olde world style map. The pearing of the oceans gives enough contrast that the terrain really pops. The italian leather adds some texture of its own so every portion of the map has some character. It's taken a good solid week of work to pull together but I don't think there's a single bit I'd change if I could.


Because the draft took so long to make I decided against using the conventional form of transfer. Typically, once the leather is cased a print-out is placed on the leather and traced with a stylus to transfer the design onto the leather. However, if I did that this time then I knew there was a reasonable chance the leather would decase before I was ready to carve it. So I decided to use an ink transfer to apply the entire design to the leather all at once. Instead of spending 15 hours (more likely twice that) transferring the design, it'd be done in 15 minutes.

I've used ink transfers on leather before, but never for this particular application. So since this project was so big I did some experimenting and one full proof of concept to make sure everything worked together. I wound up determining that I would get the best transfer by applying the ink transfer immediately after casing the leather.


From that point on it was mostly established territory. I cut the design into the leather and went back over it it to carve and stamp as appropriate. This was the first project I've done with really high quality veg tan from Italy (thanks to new suppliers) and it carves beautifully. The transfer wasn't perfect so there were some spots where I was going off memory and my printed draft to guide the swivel knife but that turned out to work pretty well. The original artist had used different lines to distinguish types of terrain and I followed suit using different carving techniques to accentuate those differences. In particular I used a pear to carve the water, rather than burnishing it as I would normally do. This helps to raise the land even more and creates an effect I rather appreciate.


The result is satisfyingly impressive. Almost all of the original map's detail has carried over. Even some of the subtler effects, like the hill-ribs, can be seen on the leather. The tinting and antiquing gel work together to create an excellent impression of an olde world style map. The pearing of the oceans gives enough contrast that the terrain really pops. The italian leather adds some texture of its own so every portion of the map has some character. It's taken a good solid week of work to pull together but I don't think there's a single bit I'd change if I could.


Friday, January 22, 2016
Strap with new Hardware
This strap was pretty conventional as straps go but it was the first purchased using the new variant listings and to use the new hardware. The client just had to select the options he wanted when he made the purchase and mention the monogram in the notes. And the hardware works great. I think it's far better than what I used to get over at Tandy. A marked improvement all around.


Thursday, January 21, 2016
A Zappy Anniversary Card
Most of this week has been dedicated to finishing one giant order before we run off to PAX next week. I was still able to squeeze in a quick order for a leather card. In this case, the client and her husband will soon be celebrating their ninth anniversary (#9 being the leather one). Her husband is a fan of many of the geek mainstays but with the movie just recently out Star Wars is topping his list at the moment. Hence a fun little call-back to one of those lines that only Han Solo himself would be able to get away with...


Friday, January 8, 2016
Off to a good start
I've had a handful of orders to process this week but that hasn't stopped me from starting to update the shop's listings. I've been paying particular attention to the shoulderstrap listings but about half the listings have gotten some sort of tweaking by now. Previously, I had four separate listings for shoulder straps (based on 1" or 1.5" width and nickel or brass hardware). Now I have three listings: Thin, Medium, & Wide which correspond to 1", 1.5", and 1.75" widths. Making use of Etsy's "Variant" feature I've added some dropdowns to the listings so that the client can select from the basic colors and hardware finishes. And of course, that means the listing gets a handy photo guide to those options:

I've been making use of the variant feature all over the place and I reckon it'll make things a lot easier for clients who just want to submit a quick order. Much as I like chatting with clients to figure out just what they want, most of the time they wind up going with the same 3 or 4 options.
I've also managed to finally open the listing for the Shoulder Pads. It's been on my To Do list since last Fall but I didn't have all the pieces together to really get the job done until recently. I might create a listing to order Shoulder Pads together with Shoulder Straps but there's so many options there I'm still working out how to merge the two.
I received a pretty big order of new hardware yesterday and I'm really pleased with it. I was already happy that per unit this supplier is vastly less expensive than Tandy. In addition that the product is noticeably higher quality. Even if the buckles weren't labeled as "solid brass" you can tell from the nice heft. I'll need to pay more attention to inventory management to make sure I don't run out of stock but I'm really enjoying pecking a bit higher on the supply ladder.

As I mentioned earlier, I've had a full docket of orders this week. Four straps and a pair of pouches. One of the straps is still WIP while I procure a special order buckle for it but the other three and the pouches are already in the mail. One of these was a twin to the LEGENDARY strap I made last year (the client acquired another card crate and wanted a matching strap for it) so that was pretty satisfying to work on.


Still more to come but I figured I'd better post a blurb before it got too far along.
Monday, January 4, 2016
Printer Calibrations
One of my goals this year was to finally get the printer spitting out good quality prints. This has been an ongoing issue with my M3D printer and has been the biggest factor limiting its use. I generally wind up needing to print something 3-4 times to get an acceptable print and even then it's not always as good as I would like. It's a troublesome thing to troubleshoot since there isn't one particular problem to be fixed that would solve everything.

I fixed a lot of problems by moving the spool over the printer to reduce tension but I was still getting intermittent issues that I eventually tracked down as being most likely due to backlash. Backlash happens when the bits that move the printhead are a little too loose/tight. A tiny wobble builds up over the course of the print that can eventually result in a dramatic, cascading problem. When I last looked into this, there wasn't much available on how to resolve backlash on this printer. Typically you would adjust the parts that need adjusting but it isn't really clear if that's even an option on this model. That might be why there's an FAQ now on how to calibrate the printer's firmware to adjust for backlash. It's possible that setting was there before and I missed it all this time, but once I found it I was able to spend a Friday tweaking, refining, and generally fiddling with it until I got a result that was much better that where I started.

In practical terms this meant printing a calibration model, judging how badly it came out, tweaking the setting, printing it again, and seeing if there was any improvement. This takes a fair while because there's two settings to adjust (one for each axis) and they both interact. On the upshot, it gave me ample opportunity to make Mass Effect references.

I might do a little more tweaking to really hone in on a sweet spot but I think I've gotten pretty close. And just to prove it I had the printer spit out something it never would've been able to manage before hand. I did have to reprint this one or twice but only because I didn't get the right Fill setting at first.

I fixed a lot of problems by moving the spool over the printer to reduce tension but I was still getting intermittent issues that I eventually tracked down as being most likely due to backlash. Backlash happens when the bits that move the printhead are a little too loose/tight. A tiny wobble builds up over the course of the print that can eventually result in a dramatic, cascading problem. When I last looked into this, there wasn't much available on how to resolve backlash on this printer. Typically you would adjust the parts that need adjusting but it isn't really clear if that's even an option on this model. That might be why there's an FAQ now on how to calibrate the printer's firmware to adjust for backlash. It's possible that setting was there before and I missed it all this time, but once I found it I was able to spend a Friday tweaking, refining, and generally fiddling with it until I got a result that was much better that where I started.


In practical terms this meant printing a calibration model, judging how badly it came out, tweaking the setting, printing it again, and seeing if there was any improvement. This takes a fair while because there's two settings to adjust (one for each axis) and they both interact. On the upshot, it gave me ample opportunity to make Mass Effect references.

I might do a little more tweaking to really hone in on a sweet spot but I think I've gotten pretty close. And just to prove it I had the printer spit out something it never would've been able to manage before hand. I did have to reprint this one or twice but only because I didn't get the right Fill setting at first.
Friday, January 1, 2016
Coming in 2016...
2016 is finally here and I've got a lot to look forward to. I'll be heading back home to San Antonio in a few weeks for another round at PAX South. This year it may be more about visiting with folks than seeing the convention, but I'm anticipating a good trip either way.
I've found new and interesting suppliers all over the place to replace Tandy. As part of that I'll have some new options hardware-wise that I'll be able to offer. I've been focusing on the shoulder straps since they make up the biggest share of my orders but with a wider field of suppliers I think everything will come out a bit better off. I've got some stock on its way and when it arrives in a week or two I can be a bit more specific.
I've got some new listings that are finally going up as well. Shoulder Pads, the DM Toolbox, and D&D Tabs should be going up within the next week or two. About the same time I'll be rolling out a new pricing formula that should shift some of the prices around a bit and make them a bit easier to parse.
There are a few other long term projects on my docket that I'll be tinkering with this year. One of those is the M3D printer, or specifically figuring out what I need to tweak to some really good prints out of it. Another is D&D-related and it'll stay shush-shush for now. A third thing that I'd like to get back to this year is sending out gifts to particular podcasts/creators I've enjoyed. It's not exactly business related but I get a lot from them while I'm whittling away and I enjoy giving something back.
So that's what I've got for 2016! I've already got some orders in the chute so you can be sure more'll be coming! I hope you had a very merry New Year and perfectly pleasant 2016!
Subscribe to:
Comments (Atom)